

A few weeks ago, I had the good fortune to attend a two-day training course at work on improving my React Testing Library knowledge and skills.
At my job, my team relies heavily on many forms of automated testing (unit, integration, end-to-end, etc.) to help ensure that all the pieces of our app are working correctly. So when I took the course, I already had a basic understanding of how to use React Testing Library (RTL) because we had begun using it a few months prior as we started writing more React hooks-based components in our application. Our previous unit testing combination of Jest and Enzyme had stopped meeting our needs as well.
This training, however, opened my eyes to some really helpful info around using RTL I was totally unaware of. I wanted to share nine of the biggest takeaways for me in hopes that they’ll help you in your own use of this testing library.
What Is React Testing Library? And Why Is It Different?
Note: This is not a “Getting Started with RTL” piece. This article assumes you already have a pretty good understanding of how to use the testing framework. My aim is to show you some additional tricks to make writing (and debugging) tests easier.
With that said, I will give a brief overview of the whys and hows of React Testing Library before I dive into the meat of this article.
The why
Kent C. Dodds created the React Testing Library to address one problem: other testing libraries encouraged developers to write tests that were too tightly coupled to the implementation details of the components they were testing. Dodds believed that the tests should only verify the end results (the behavior) of the components.
It makes sense when you think about it, right?
Why don’t we write integration tests closer to the way we write end-to-end tests? Tests that focus on the user’s perspective (how the component looks and behaves in the DOM). Because that’s what ultimately matters in the end: Do the components do what they’re supposed to do when a user interacts with them?
We don’t necessarily care if it stores something in the Redux store or makes a particular API call to fetch data. Users don’t know or care about that — they care about if the screen shows the info they clicked on or the item they ordered is being shipped to them. And as developers, RTL’s stance is that we should care about that too.
To that end, Dodds recommends approaching testing in the following way:
- Avoid dependencies on the implementation details of your components.
- Make testing easy to maintain (i.e. refactoring the component implementation does not break the tests).
- Avoid shallow mounting, as we want to test that the components integrate to solve a user problem (such as editing data in a form).
And this leads me to…
The how
The React Testing Library is a very lightweight solution for testing React components. It provides light utility functions on top of react-dom and react-dom/test-utils in a way that encourages better testing practices.
Here are some interesting aspects of React Testing Library:
- It focuses on verifying actual DOM nodes rather than verifying instances of rendered React components.
- It provides utilities for querying the DOM in the same way the user would.
- It finds elements by their label text (just like a user would).
- It finds links and buttons from their text (like a user would).
- It provides a way to find elements by a
data-testidas an “escape hatch” for elements where the text content and label do not make sense or are not practical or available.
Now that that’s out of the way, let’s get to the good stuff: the hot tips.
Tip #1: Screen Instead of Component
Have you ever thought to yourself, “Boy, writing component.getByText... or component.getByLabel... all the time sure is annoying. I wish there was another way”? Turns out there is: It’s called screen.
All of the queries exported by DOM Testing Library (which RTL is built on top of) accept a container as the first argument. Because querying the entire document.body is very common, DOM Testing Library also exports a screen object that has every query that is pre-bound to document.body (using the within functionality).
Here’s how you use it:
import React from "react";
import { screen } from "@testing-library/dom";
import { render } from "@testing-library/react";
import { act } from "react-dom/test-utils";
import App from "./App";

describe("Product Browser App", () => {
  it("renders a welcome message", () => {
    act(() => {
      render(<App />);
    });
    screen.findByText("Hello world");
  });
});
Trust me: After a while, screen will become increasingly handy as you’re writing tests to check what’s visible or enabled (or not) in the DOM as you manipulate it.
Tip #2: FindByText Instead of waitForElement…getByText
If you’ve used RTL before, you probably know it has several handy async functions that start with waitFor, waitForElement, or waitForElementToBeRemoved. These can be useful to wait for an element to appear or disappear in response to an action.
Typically, the waitFor code would look something like this:
const orderButton = await waitForElement(() => container.getByTestId("order-submit-button"));The line above is pretty clean and concise, but there’s an even cleaner way to write this: with the help of findBy....
Check this out:
const orderButton = await container.findByTestId("order-submit-button");By using any of the findBy queries that RTL makes available (findByText, findByTestId, findByPlaceholder, etc.), it automatically wraps the element to be searched for in a promise that will wait for it to be rendered, saving you from having to write the wrapper code yourself.
On its own, this might not seem like much, but imagine writing many multiples of this sort of test all over your application. The leaner test code starts to add up quickly.
Tip #3: UserEvent for Async Actions
H/T to Kent C. Dodds for letting me know that functions like render() and fireEvent() don’t actually need to be manually wrapped in act() — every async utility is automatically wrapped courtesy of RTL. Sweet — that’s even more knowledge for you!
I do want this to stay a 9 tip blog post, however, so I still wanted to share a library making asynchronous actions like click() or select() just a wee bit simpler, just so you’re aware it exists.
Here’s what the typical async event code looks like in RTL:
await fireEvent.click(orderButton);Not the worst thing to have to write… but consider the amount of async / await events you have for one fairly complex test case. And write multiple tests to test one component.
The user-event library “tries to simulate the real events that would happen in the browser as the user interacts with it. For example userEvent.click(checkbox) would change the state of the checkbox.”
Just import it at the top of your test file like so:
import userEvent from "@testing-library/user-event";Now, here’s that same code from above with the userEvent library applied:
userEvent.click(orderButton);Look at how that code got even leaner! This, to me, was a game-changer when I learned about it and I absolutely love using it now in my own tests.
Note: The user-event library doesn’t fully support all async actions in RTL yet. Some actions like change and keyDown are not available in user-event, but the library is looking for people to add to it, so if you’d like to contribute, I’m sure they’d appreciate the help.
Tip #4: PrettyDOM Instead of debug
Debugging non-working code is painful. Debugging non-working tests can be even more painful — especially when you run RTL’s component.debug() on the component, but the component’s DOM tree is so large it cuts off before the whole thing is rendered in the console.
console.log(component.debug());Here’s what the console shows when the typical debug() runs in an RTL test:
There’s a solution to this annoyance, however. It’s called prettyDOM(), and RTL’s debug() method is actually built on top of it. The prettyDOM function originates in the DOM Testing Library and allows for extra configuration beyond just specifying the component or element to print out. It has an optional maxLength parameter to limit the size of the resulting string — or, in my case, to print out very, very large DOM trees.
Here’s how I use prettyDOM to print those pesky extra-big DOM trees:
console.log(prettyDOM(component.container, 99999));And here is another snippet of the DOM tree being rendered to the console with prettyDOM. Notice that it keeps going after the RTL debug() method ends:

Lately, prettyDOM’s been a real life-saver for me when I’ve been trying to debug some particularly tricky components in my team’s application. Without this option, it would have taken me so much longer to figure out what the problems with the test were.
Tip #5: Document.querySelector to Check a Component’s Classes
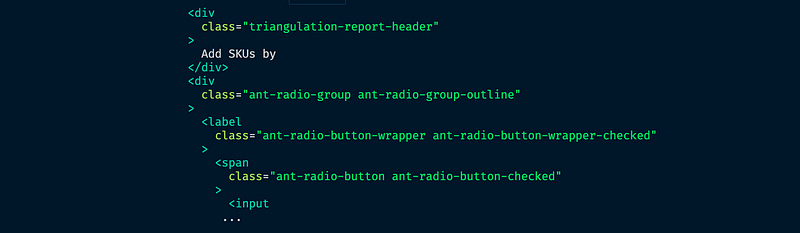
I hope you don’t run into this issue — I really do — but if you’re using a component library in your React application like Ant Design, you’re going to learn very quickly that testing some of the more complex components (e.g. tables, radio buttons, etc.) can get really painful with RTL.
This is because a lot of the typical ways you’d use to ID and check elements with RTL don’t exist (or are too generic) on Ant components. And in some cases, you need to check whether Ant elements are enabled or disabled, but unlike how a custom component might have a data-testid to target, Ant does not. It has an additional class added to its className property instead.
But RTL doesn’t offer an option for checking component classes. In that case, we have to resort to the document level of the DOM and employ document.querySelector.
To check if an Ant component is hidden, here’s how I did it below:
expect(document.querySelector(".hidden")).toBeInTheDocument();It’s not particularly elegant code, but it works in a pinch. Just like Kent C. Dodds says to consider data-testid as an “escape hatch,” consider document.querySelector() in the same vein. Use it sparingly and only if you have no other options to target an element in RTL.
Tip #6: ParentElement to Access Elements Above the Target
This is a lesser-known trick I only learned this past week — again because Ant components are a pain to test with React Testing Library.
I needed to enter text into an input, then click a plus (+) button at the end of the input box for the value to be saved into the DOM. The plus button, however, happened to be a level above the input element in the component, so in order to target it, I learned about the parentElement selector, which is actually native to the browser, not RTL specifically. And I couldn’t just search the whole component for the plus button because there were multiple plus buttons on the page for multiple inputs.
const input = component.queryByPlaceholderText(componentText);
const enter = input.parentElement.querySelector(".anticon-plus");
As you can see in the example above, first I created the variable input targeting the input, then I created the second variable enter targeting the plus button in the input’s parent element.
This let me click the correct input plus button even though there was no data-testid or other individually defining characteristic about this Ant input. It’s come in pretty handy as of late. I hope it can help you too.
Tip #7: PreviousSibling and nextSibling to Access Elements in Line With the Target
In a very similar situation, I also learned about the options of previousSibling and nextSibling (also browser native properties) to select elements around a particular element being targeted in the DOM by React Testing Library.
In this scenario, I needed to click a checkbox in an Ant table component to select one of the options present in the table. The checkbox element was a sibling of the option’s name, which was the only unique element present in each row of the table.
const keyToSelect = await component.findByText("key to select");
userEvent.click(keyToSelect.previousSibling.firstChild.firstChild);
First, I created a variable (keyToSelect) targeting a single row in the Ant table using the unique name of the row ("key to select"). Then I was able to use the previousSibling of the targeted element to access the checkbox and select the row inside the table.
Not exactly the easiest syntax, I’ll admit, but it solved my problem. And you can do exactly the same type of element targeting using nextSibling as well.
Tip #8: Use { exact: false } for Fuzzy Text Matches in the DOM
Sometimes, it’s tough to use one of the getByText- or findByText-type searches in RTL because it defaults to exact matching. This means getByText("Hi there") will only work if the string is exactly the same in the DOM: full-string, case-sensitive. If there’s a <span>, a newline (\n), or something else between "Hi" and "there", this getByText() query would fail to find the text.
To do a fuzzy match, which will not be case-sensitive and will include substrings, you can add { exact: false }.
Check out this example below:
<div>Hi there!</div>

getByText(container, "i the", { exact: false });
getByText(container, "hi there", { exact: false });
Although it’s more recommended to use a regex if you need to match a substring, for a simpler text selection in the DOM, I think this is a fine substitute. And I don’t know about you, but I always have to test regex out in the browser to remember how to write it. I use it so infrequently.
Tip #9: Open Any File in the Browser From the Command Line
Final tip, and this one isn’t actually specific to React Testing Library, but I learned it in this class as well and I think it’s pretty cool.
If you’re using VS Code as your JavaScript IDE of choice and you want to open a file in the browser from the VS Code built-in terminal command line, it’s a snap.
In the command line, all you have to do is type open <file path>, and voila: A new window pops open in your browser.
The reason I mention it here is because it provided a quick and easy way for me to check my code coverage, as I added new tests to our application. I find it a lot easier to click around in the browser version of code coverage to see which lines are tested than using the little printout in the terminal.
For example, to open code coverage for our project, I’d write:
open coverage/lcov-report/index.htmlAnd there it is, ready to be examined in detail. VS Code handy shortcuts for the win. I thought it was a fun fact and I hope you might find it useful too.
Conclusion
React Testing Library is a powerful framework that’s really changed the way we approach integration testing React applications. It took a minute for me to wrap my head around the changes that RTL entails, but I think it makes more sense for how the application should really work in the real world.
And although I knew some things about React Testing Library, I learned a lot of lesser-known tips and tricks that have helped simplify and streamline my own testing.
Check back in a few weeks — I’ll be writing more about JavaScript, React, ES6, or something else related to web development.
Thanks for reading. I hope you learned a few new things that will make your own use of the React Testing Library that much easier. Integration testing nowadays is a necessary piece of any good web application. The least I can do is try to make it a little easier for you.
References and Further Resources
- React Testing Library documentation
- React Testing Library GitHub repo
- RTL User Event GitHub repo